
What I use
NordVPN — the VPN that actually works on Linux
Most VPNs on Linux mean fighting with OpenVPN configs. NordVPN has a proper native client — one command and you’re connected.
Let’s get one thing straight right from the start: the old, tired argument that “you can’t game on Linux” is dead. Deceased. It is an ex-parrot. For years, this was the convenient excuse, the final bastion for those unwilling to leave the walled garden of Windows. I’ve heard it in server rooms, forums, and from colleagues for over a decade. But times have changed, and frankly, if you’re still repeating that line, you’re living in the past.
The truth is, Linux gaming isn’t just a niche hobby for terminal wizards anymore. It’s a robust, thriving ecosystem that, in many cases, offers a superior experience. This isn’t just about ideology or open-source purity. It’s about performance, control, and a future where your game library isn’t shackled to a single operating system. The engine driving this revolution? Valve’s Steam platform and its groundbreaking Proton compatibility layer.
So, you’re here because you’re ready to make the switch or just want to see what all the fuss is about. You’ve got a Linux machine, a desire to play your games, and you need a no-nonsense guide to get it done. You’ve come to the right place. We’re not just going to follow a recipe; we’re going to understand the why behind the how. We’ll cover everything from the basic install Steam Linux process on various distributions to tweaking your setup for maximum performance and troubleshooting those inevitable hiccups. Let’s fire up the terminal and get to work.
The State of Linux Gaming in 2025: A Golden Age
Before we dive into the commands, it’s crucial to understand the landscape. This isn’t the Linux of 2010 where you had to sacrifice a goat and compile three custom kernels just to run a 2D indie title. Thanks to Valve’s massive investment, the situation has improved at a breathtaking pace.
The star of the show is Proton. Think of Proton as a universal translator. Windows games speak a language (APIs like DirectX) that Linux doesn’t natively understand. Proton, which is a compatibility layer built from a souped-up version of WINE (Wine Is Not an Emulator), translates those DirectX calls into Vulkan, an open-source graphics API that runs beautifully on Linux. The result? A massive number of Windows-only games run on Linux, often out-of-the-box, with no user intervention required. Some even run faster than on Windows, thanks to Linux’s more efficient kernel and lower overhead./

Valve Steam Deck 1TB Upgraded Handheld Gaming Console with Carring case, 1280 x 800 LCD Display Silicone Soft Cover Protector & Joystic Cap & Tempered Glass Film Bundle
- Valve is entering the gaming console marketplace with the new Steam Deck, a console geared towards PC gamers. The Steam Deck can be docked to a monitor, and used as a PC, or docked to a TV.
- Players can play a huge variety of games at any time with the comfort of a console and the freedom of a PC. Not anti-glare screen.
- Like the name suggests, the Steam Deck will include upgraded 1TB storage, and will include a carrying case. A micro SD slot will also enable expanded storage.
List Price :
Offer: 579.99
Go to AmazonThe Pros: Why Game on Linux?
- Performance: With a lighter OS and the power of the Vulkan API, many games see a performance boost on Linux. You’re not wasting CPU cycles on background telemetry and forced updates.
- Control & Freedom: It’s your system. You decide when to update, what runs in the background, and how your desktop looks and feels. No forced reboots in the middle of a raid.
- Cost: The OS is free. The tools are free. The community is priceless.
- The Steam Deck Effect: Valve’s Steam Deck handheld runs on a custom version of Arch Linux. This means every game developer who wants their title “Deck Verified” is now actively testing and optimizing for Linux via Proton. This has caused a tidal wave of support and compatibility improvements.
The Cons: The Lingering Hurdles
I believe in pragmatic solutions, and that means being honest about the downsides. While the experience is fantastic, it’s not without its challenges. The single biggest obstacle today is aggressive, kernel-level anti-cheat software.
Some multiplayer games, especially competitive esports titles like Valorant or League of Legends (though LoL has other issues), use anti-cheat systems that dig their hooks deep into the Windows kernel. These systems often refuse to run in a compatibility layer like Proton, effectively blocking the game. While Valve has worked with anti-cheat developers like Epic (Easy Anti-Cheat) and BattlEye to enable Proton support, it’s up to the individual game developer to flip that switch. Many have, but some major holdouts remain.
The bottom line? For a vast library of single-player games and many multiplayer titles, Linux is a dream. For a specific subset of competitive shooters, you might still need to keep a Windows partition around. Always check a game’s status on a site like ProtonDB before you buy.
Prerequisites: Gearing Up for the Install
Alright, enough theory. Let’s get our hands dirty. The good news is, you don’t need much. This process is far simpler than it used to be.
- A Modern Linux Distro: We’ll be covering the most popular families. This guide is tailored for recent versions of Ubuntu, Debian, Pop!_OS, Linux Mint, Arch Linux, Manjaro, EndeavourOS, and Fedora. If you’re on something else, the principles (and likely the Flatpak method) will still apply.
- An Internet Connection: Steam is a big download, as are the games. A stable, reasonably fast connection is a must.
- Sudo/Root Access: We’ll be installing system-level software, so you’ll need administrator privileges on your machine.
- Basic Terminal Familiarity: Don’t be scared! The terminal is your most powerful tool. I’ll explain every command we use, so even if you’re new, you’ll be able to follow along and learn what’s happening under the hood.
Part 1: The Installation Battle Plan: Choosing Your Method
In the world of Linux, there’s rarely just one way to do something. Installing Steam is no exception. You have a few choices, and the one you pick can have implications for updates and system integration. I’ll break down the main contenders.
- Native Package Manager (.deb/.rpm/pacman): This is the traditional method. You use your distribution’s built-in software management tool (like `apt`, `pacman`, or `dnf`) to install a version of Steam packaged specifically for your OS.
- Pros: Tightly integrated with the system. Often feels the most “native.”
- Cons: Can sometimes lag slightly behind the absolute latest version. Can have dependency issues, especially with 32-bit libraries on modern 64-bit systems.
- Flatpak: This is a modern, universal packaging system. A Flatpak is a sandboxed bundle that contains the application and almost all of its dependencies. You install a Flatpak runtime once, and then you can install any Flatpak app on virtually any Linux distro.
- Pros: Universal (works on any distro with Flatpak support), sandboxed for better security, and dependencies are self-contained, which eliminates a whole class of problems. Updates are often very fast.
- Cons: Can use slightly more disk space due to bundled libraries. The sandboxing can occasionally create issues with games needing access to files outside their designated area, though this is becoming rare.
My recommendation? If you’re new to Linux or just want the most hassle-free, “it just works” experience, go with the Flatpak version. I’ve found it to be incredibly reliable and it sidesteps many of the classic dependency headaches. However, for the sake of completeness and for those who prefer the traditional route, I will cover all methods in detail.
Part 2: Step-by-Step Guide: How to Install Steam on Linux
Alright, time for execution. Find the section that matches your distribution’s family and follow along. I’ll provide the exact commands and explain what each one is doing.
For Debian, Ubuntu, Pop!_OS, and Derivatives
This family of distributions uses the APT package manager and `.deb` files. You have two excellent options here.
Method A: Using the Official .deb Package (Recommended Native Method)
This method involves downloading the installer directly from Valve and letting it set up the official software repositories for you. It’s clean and ensures you get updates correctly.
Step 1: Download the Steam Installer
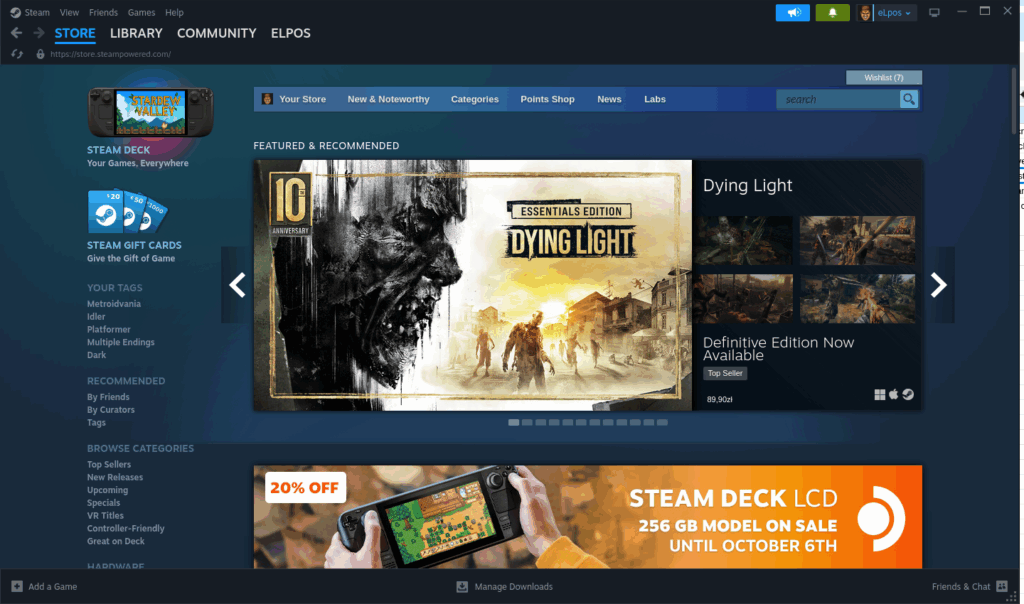
Open your web browser and navigate to the official Steam download page at store.steampowered.com/about. Click the big blue “INSTALL STEAM” button. This will download a file named `steam_latest.deb`.
Step 2: Install the Package
Open your terminal. By default, the file will be in your `~/Downloads` directory. We’ll use `cd` to navigate there and `apt` to install it. `apt` is smarter than the older `dpkg` command because it will automatically fetch and install any required dependencies.
cd ~/Downloads

sudo apt install ./steam_latest.deb
What’s happening here?
– cd ~/Downloads: This changes your current directory to your Downloads folder.
– sudo apt install ./steam_latest.deb: We use `sudo` to run the command with administrator privileges. `apt install` is the command to install software. The `./` before the filename is important—it tells the terminal to look for the file in the current directory. The system will now read the `.deb` file, see that Steam needs a bunch of other software packages (its dependencies), and automatically download and install them for you.
You’ll be prompted for your password and asked to confirm the installation by pressing ‘Y’. Let it run, and you’re done! Steam will now be in your application menu.
Method B: Installing from the Ubuntu Repository
For a quicker, terminal-only method, you can install the version of Steam included in your distribution’s official repositories. First, we need to make sure the “multiverse” component is enabled, as that’s where Steam lives.
Step 1: Add the Multiverse Repository and Enable 32-bit Support
On modern 64-bit systems, Steam still relies on some 32-bit libraries. We need to explicitly enable the architecture first. This is one of the most common stumbling blocks I see people hit.
sudo add-apt-repository multiverse

sudo dpkg --add-architecture i386

sudo apt update
What does this do?
– sudo add-apt-repository multiverse: This command enables the ‘multiverse’ section of Ubuntu’s software sources, which contains non-FOSS (Free and Open-Source Software) that is nonetheless approved for distribution.
– sudo dpkg --add-architecture i386: This is the critical step. It tells your 64-bit OS that it’s okay to install and manage 32-bit (i386) software packages.
– sudo apt update: This refreshes your list of available software from all enabled repositories, including the newly added i386 packages.
Step 2: Install Steam
Now, a simple command is all it takes.
sudo apt install steam
This command will find the Steam package in the repository, pull in all its dependencies (both 64-bit and the 32-bit ones we just enabled), and install everything. Easy.
For Arch Linux, Manjaro, and EndeavourOS
Arch users, you know the drill. Things are usually more straightforward, provided you’ve configured your system correctly. The key here is the `multilib` repository, which contains 32-bit software for 64-bit systems.
Step 1: Enable the Multilib Repository
Most Arch-based distros like Manjaro have this enabled by default. If you’re on a pure Arch install, you may need to enable it yourself. We do this by editing the Pacman configuration file.
sudo nano /etc/pacman.conf
Inside this file, scroll down until you see the `[multilib]` section. It might be commented out with a `#` symbol. Remove the `#` from both the `[multilib]` line and the `Include = …` line directly below it.
It should look like this:
[multilib]

Include = /etc/pacman.d/mirrorlist
Save the file (Ctrl+O in nano, then Enter) and exit (Ctrl+X).
Step 2: Synchronize Repositories and Install Steam
Now that multilib is enabled, we need to refresh our package database and then we can install Steam.
sudo pacman -Syu

sudo pacman -S steam
Why these commands?
– sudo pacman -Syu: This is the standard Arch command to fully update your system. It synchronizes the package databases (`y`), updates installed packages (`u`), and allows downgrades if necessary (`y`). It’s good practice to do this before installing new software.
– sudo pacman -S steam: This command tells Pacman to install (`-S`) the `steam` package. It will automatically handle all the necessary 32-bit libraries from the multilib repository we just enabled. That’s the beauty of Arch.
For Fedora and RPM-based Distros
Fedora keeps its official repositories strictly open-source. To get proprietary software like Steam and various media codecs, the community standard is to use the RPM Fusion repository.
Step 1: Enable the RPM Fusion Repositories
RPM Fusion comes in two parts: “free” and “nonfree”. We need both. You can install them with a single, long command that you can copy and paste directly from the official RPM Fusion configuration guide.
sudo dnf install https://mirrors.rpmfusion.org/free/fedora/rpmfusion-free-release-$(rpm -E %fedora).noarch.rpm https://mirrors.rpmfusion.org/nonfree/fedora/rpmfusion-nonfree-release-$(rpm -E %fedora).noarch.rpm
What’s this monster command doing?
It’s using `dnf` (Fedora’s package manager) to install two `.rpm` packages directly from the web. The `$(rpm -E %fedora)` part is a clever trick that automatically inserts your current Fedora version number into the URL, so this one command works for any supported version of Fedora.
Step 2: Install Steam
Once RPM Fusion is enabled, installing Steam is trivial.
sudo dnf install steam
Just like with the other package managers, `dnf` will now find the Steam package in the newly enabled RPM Fusion repository and install it along with all its required dependencies.
The Universal Soldier: Installing Steam via Flatpak
If the above seemed complicated, or if you’re on a distro I didn’t mention, Flatpak is your best friend. This is my preferred method for its simplicity and reliability.
Step 1: Install Flatpak and Add the Flathub Repository
First, you need Flatpak itself. Most major distributions come with it pre-installed these days. If not, you can easily add it. Refer to the official Flatpak setup guide for your specific distro.
Once Flatpak is installed, you must add the main repository, called Flathub, where thousands of apps (including Steam) are stored.
flatpak remote-add --if-not-exists flathub https://flathub.org/repo/flathub.flatpakrepo
Why this command? This adds the “flathub” remote repository to your Flatpak configuration, so your system knows where to look for apps. The `–if-not-exists` flag means it’s safe to run even if you already have it set up.
Step 2: Install Steam from Flathub
Now, just tell Flatpak to install Steam.
flatpak install flathub com.valvesoftware.Steam
Flatpak uses a reverse-domain-name style for application IDs. It will show you the required runtimes and dependencies it’s going to download and ask for confirmation. Say ‘Y’, and let it do its thing. It might be a larger download initially because it’s pulling down a self-contained environment, but subsequent app installs will be much smaller.
Verifying Your Setup and First Launch
Regardless of which method you chose, you should now have a Steam icon in your application launcher. Go ahead and click it.
The very first time you launch Steam, it will need to perform a self-update. A small window will appear, downloading the latest Steam runtime and other components. This is normal. Just let it finish. Once it’s done, the familiar Steam login window will appear.
Log in with your credentials, and you’re in! Welcome to your game library on Linux.
Unleashing the Power: A Steam Proton Guide for Beginners
Simply installing Steam is just the first step. The real magic for Linux gaming lies in Proton. By default, Steam will only show you games that have an official, native Linux version. We need to tell it to unlock its full potential and let us play Windows games.
Step 1: Enable Steam Play (Proton)
In the Steam client, go to the top-left menu: Steam > Settings. In the settings window, navigate to the “Compatibility” tab on the left.
Here, you will see a checkbox labeled “Enable Steam Play for all other titles”. Check this box.
Below it, there’s a dropdown menu to select a specific version of Proton. It’s usually best to leave this on the latest stable, officially-supported version (it won’t have any suffix like ‘GE’). Click ‘OK’ and Steam will ask to be restarted. Do it.
What did we just do?
You just told Steam: “I don’t care if a game wasn’t made for Linux. Download the Windows version and try to run it using the Proton compatibility layer.” When you restart, you will see your entire game library, not just the Linux-native ones.
Step 2: Check ProtonDB for Compatibility
Before you install a 50GB Windows game, it’s wise to check how well it works. The go-to resource for this is ProtonDB. It’s a massive, community-driven database where users submit reports on how well games run with Proton, what tweaks they used, and any issues they encountered.
The ratings are simple:
- Borked: The game is unplayable.
- Bronze/Silver: It runs, but with significant issues or requires a lot of tweaking.
- Gold: Runs perfectly after some minor tweaks.
- Platinum: Works perfectly right out of the box.
- Native: The game has an official Linux version.
Always search for a game on ProtonDB. It’s the single most valuable tool in a Linux gamer’s arsenal.
Step 3 (Advanced): Using Proton-GE
While Valve’s official Proton is amazing, there’s a community-maintained version called Proton-GE (Glorious Eggroll) that is often even better. It includes patches and media codecs that Valve can’t legally distribute, which can fix issues with video cutscenes or enable certain games to run that don’t with the standard Proton. You can easily install this using a tool called `ProtonUp-Qt`, which you can find in your distro’s app store or as a Flatpak.
Troubleshooting Common Issues
Sometimes, things don’t go according to plan. If you find that Steam not launching Linux is your problem, or a specific game is being difficult, here are some common issues I’ve helped people solve over the years.
- Issue: Steam won’t launch at all after installation.
Cause: This is almost always due to missing 32-bit graphics drivers or libraries, especially if you used a native package manager.
Solution: Open a terminal and try to run Steam by just typing
steamand hitting Enter. Watch the output. It will usually print an error message telling you exactly which library is missing (e.g., `libGL.so.1: cannot open shared object file`). Search for that library in your package manager and install the 32-bit (`i386` or `i686`) version. This is why I recommend Flatpak—it completely avoids this problem. - Issue: A specific game won’t launch, or crashes on startup.
Cause: This could be anything from a specific Proton bug to a missing dependency within the game’s environment.
Solution: First, check ProtonDB! Someone has likely already solved this. The most common fix is to force the game to use a different version of Proton. Right-click the game in your Steam library, go to Properties > Compatibility, check the box “Force the use of a specific Steam Play compatibility tool”, and select a different Proton version from the list (try an older one, or Proton-GE if you have it). You can also find launch options on ProtonDB (like `PROTON_USE_WINED3D=1 %command%`) that can fix specific rendering issues.
- Issue: Poor performance or graphical glitches.
Cause: Outdated or incorrect graphics drivers.
Solution: Ensure you are using the correct, up-to-date drivers for your GPU.
- NVIDIA: You absolutely need the proprietary NVIDIA driver. The open-source ‘nouveau’ driver is not suitable for gaming. Use your distro’s driver manager or software center to install the latest proprietary driver.
- AMD/Intel: The open-source drivers (Mesa) are fantastic and are the recommended choice. Just make sure your system is fully updated to get the latest version. Running a recent Linux kernel is also highly beneficial for AMD users.
- Issue: A multiplayer game kicks me out, citing an anti-cheat violation.
Cause: The game uses an anti-cheat that is not compatible with Proton, or the developer has not enabled support.
Solution: Unfortunately, there’s often no client-side fix for this. This is the brick wall I mentioned earlier. You can check sites like
areweanticheatyet.comfor compatibility status. Your only recourse is to respectfully ask the game developer to enable Proton support—a request that is becoming more successful thanks to the Steam Deck’s popularity.
Conclusion: Key Takeaways and Next Steps
We’ve covered a lot of ground, from the philosophy of Linux gaming to a detailed, multi-distro guide on how to install Steam on Linux. We’ve demystified Proton, armed you with troubleshooting techniques, and hopefully, shattered some old myths.
The key takeaway is this: gaming on Linux is no longer a compromise. It’s a first-class experience driven by a passionate community and the corporate might of Valve. With the power of Proton, your game library is more portable and future-proof than ever. You have the freedom to choose your operating system without sacrificing your favorite hobby.
Your journey doesn’t end here. Now that you have Steam running, it’s time to explore. Dive into ProtonDB, experiment with different Proton versions, and maybe even try tools like MangoHud to see your performance metrics in real-time. The Linux gaming ecosystem is vast and full of powerful tools for those willing to look.
What has your experience been like? Did you run into a snag I didn’t cover? Share your successes and questions in the comments below. Let’s help each other build the best gaming platform on the planet.
“The truth is, Linux gaming isn’t just a niche hobby for terminal wizards anymore. It’s a robust, thriving ecosystem that, in many cases, offers a superior experience. ”
This is not true. I’ve made the switch to Linux (Zorin) a few days ago. None of my steam games work, I’ve spent hours pouring through tutorials and the games just don’t work. Read plenty of cases where people’s Steam just stopped working with an update. In Windows …I just run it, and it works. Until we can get the consistency we did from Win, Linux gaming simply won’t be a thing.
And by the way, the fact that you need a long tutorial complete with terminal commands further proves my point. I’m frustrated beyond belief. Linux is nothing but tedium. Its not for your average user.
Actually many distros has gui for installing software, using command line is just more effective. Hope your Linux journey won’t end!
I completely understand you frustration. When I started working with Linux, I was in a Windows IT support role. At that time Linux did not make sense to me. I was used to “plug and play” with software titles. However, I endeavored to learn Linux (Ubuntu at the time). I’ve not been using Linux as a daily driver for about 15 years. This tutorial isn’t long necessarily. I expect what you are not understanding is that it is broken down to address different distribution families in the Linux space. Unlike Windows or MacOS, Linux has a few different flavors that have the same base DNA but still can work slightly differently.
As Martin points out, there are GUIs for installing software but the command line is simply more effective (though it has a learning curve). Even if installing Steam on Linux isn’t for you at this time, I encourage you to build a Linux based machine and use it from time to time if only to learn. Ultimately it is very rewarding.
Many Thanks for well organized description.
I am in the process of preparing fresh Debian image mainly for Steam, and I would like to have a couple of questions:
* Does Steam require root privileges anywhere in its infrastructure (apart from the install)? E. g., does it use setuid binaries?
* What is better from the resource isolation point of view, native package or flatpak?
* Where Steam stores the games themselves? I suppose in the user’s home directory? My root partition is quite small (less than 40 GB), I plan to have everything game related in /home.
Any guidance is very appreciated.
Hi, sorry for the late response, but by the end of the year Im getting biz lazy.
– Steam does not require root privileges.
– What do you mean by resources? Disk space? Ram? GPU power? Personally I prefer native packages – no problems with privileges.
– It should be here ~/.local/share/Steam/
BTW what’s your goal with this setup? If you are building gaming pc for living room, try Bazzite.